My first-generation MacBook laptop had only one problem - its first generation 60 gig hard disk . Actually it used to have two problems, but I installed more memory in it ages ago. 60 gigs doesn't go far in today's world of movies and huge software packages, so I felt it was time to upgrade. One trip to the store and a $167 EFTPOS transaction later and I am the owner of a new 320 gig hard disk, which seems to be the current sweet spot for price vs. capacity for 2.5 inch drives.
Thankfully Apple have made the job of replacing a MacBook's hard disk extremely easy, and they provide step by step instructions. All you need is a 10c coin, a Philips #1 screw driver, a piece of stiff card, and a secret tool not mentioned anywhere in the instructions! 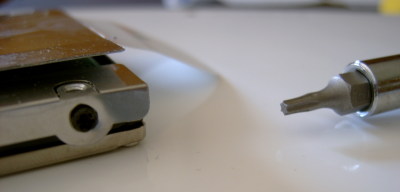
The surprise turns out to be a manner of fastening of which I was hitherto unaware - a TORX screw. TORX screws are used to hold the metal shield surrounding the drive in place, with the screw heads slotting into the bay runners - these must be removed from the old drive to fit the shield to the new drive.
Luckily I happened to have a #1 TORX bit in my tool kit, but finding an unfamiliar screw while a $3000 computer lies in bits on the dinner table is not an experience I wish to repeat.

After replacing the drive, I booted from the Leopard install disk, ran the Disk Utility to format the drive and then restored my data from my Time Machine drive. The end result is that my computer is set up exactly the same way as it was before, except I now have 250 gigs of free space to play with. Much better.